
| 일 | 월 | 화 | 수 | 목 | 금 | 토 |
|---|---|---|---|---|---|---|
| 1 | 2 | 3 | 4 | 5 | 6 | |
| 7 | 8 | 9 | 10 | 11 | 12 | 13 |
| 14 | 15 | 16 | 17 | 18 | 19 | 20 |
| 21 | 22 | 23 | 24 | 25 | 26 | 27 |
| 28 | 29 | 30 | 31 |
- LongestPalindromicSubstring
- 나는 아마존에서 미래를 다녔다
- 알고리즘
- 트리
- 파이썬
- 와썹맨
- Python
- technical debt
- 김태강
- Unique Paths
- 아마조니언
- mysql #numa #swap #memory
- 삼성역량테스트
- leetcode
- 삼성인 아마조니언 되다
- 리트코드
- BFS
- 리스트의 리스트
- 규칙없음
- 기술적 채무
- 블린이
- minimum path sum
- 그거봤어?
- 프로그래머스
- list of list
- No Rules Rules
- 동적 프로그래밍
- Dynamic Programmin
- Envoy
- 독후감
- Today
- Total
개발자가 되고 싶은 준개발자
[CKA] 쿠버네티스 클러스터 환경 구성(Vagrant, VirtualBox, KubeAdm) 본문
1. Vagrant로 VM 준비
VirtualBox를 설치.
- VirtualBox: 오라클이 제공하는 다기능 하이퍼바이저(가상화 소프트웨어)로 많은 호스트 OS와 게스트 OS를 지원.
git clone https://github.com/kodekloudhub/certified-kubernetes-administrator-course.git
cd certified-kubernetes-administrator-course
VirtualBox가 설치되면 Vagrant를 이용하여 가상 머신을 조작. 레포지토리(https://github.com/kodekloudhub/certified-kubernetes-administrator-course)에 Vagrantfile이 이미 정의되어 있음.
- Vagrant: 버추얼박스의 자동화 도구.
# -*- mode: ruby -*-
# vi:set ft=ruby sw=2 ts=2 sts=2:

# Define the number of master and worker nodes
# If this number is changed, remember to update setup-hosts.sh script with the new hosts IP details in /etc/hosts of each VM.
NUM_MASTER_NODE = 1
NUM_WORKER_NODE = 2

IP_NW = "192.168.56."
MASTER_IP_START = 1
NODE_IP_START = 2

# All Vagrant configuration is done below. The "2" in Vagrant.configure
# configures the configuration version (we support older styles for
# backwards compatibility). Please don't change it unless you know what
# you're doing.
Vagrant.configure("2") do |config|
  # The most common configuration options are documented and commented below.
  # For a complete reference, please see the online documentation at
  # https://docs.vagrantup.com.

  # Every Vagrant development environment requires a box. You can search for
  # boxes at https://vagrantcloud.com/search.
  # config.vm.box = "base"
  config.vm.box = "ubuntu/bionic64"

  # Disable automatic box update checking. If you disable this, then
  # boxes will only be checked for updates when the user runs
  # `vagrant box outdated`. This is not recommended.
  config.vm.box_check_update = false

  # Create a public network, which generally matched to bridged network.
  # Bridged networks make the machine appear as another physical device on
  # your network.
  # config.vm.network "public_network"

  # Share an additional folder to the guest VM. The first argument is
  # the path on the host to the actual folder. The second argument is
  # the path on the guest to mount the folder. And the optional third
  # argument is a set of non-required options.
  # config.vm.synced_folder "../data", "/vagrant_data"

  # Provider-specific configuration so you can fine-tune various
  # backing providers for Vagrant. These expose provider-specific options.
  # Example for VirtualBox:
  #
  # config.vm.provider "virtualbox" do |vb|
  #   # Customize the amount of memory on the VM:
  #   vb.memory = "1024"
  # end
  #
  # View the documentation for the provider you are using for more
  # information on available options.

  # Provision Master Nodes
  (1..NUM_MASTER_NODE).each do |i|
      config.vm.define "kubemaster" do |node|
        # Name shown in the GUI
        node.vm.provider "virtualbox" do |vb|
            vb.name = "kubemaster"
            vb.memory = 2048
            vb.cpus = 2
        end
        node.vm.hostname = "kubemaster"
        node.vm.network :private_network, ip: IP_NW + "#{MASTER_IP_START + i}"
        node.vm.network "forwarded_port", guest: 22, host: "#{2710 + i}"

        node.vm.provision "setup-hosts", :type => "shell", :path => "ubuntu/vagrant/setup-hosts.sh" do |s|
          s.args = ["enp0s8"]
        end

        node.vm.provision "setup-dns", type: "shell", :path => "ubuntu/update-dns.sh"

      end
  end


  # Provision Worker Nodes
  (1..NUM_WORKER_NODE).each do |i|
    config.vm.define "kubenode0#{i}" do |node|
        node.vm.provider "virtualbox" do |vb|
            vb.name = "kubenode0#{i}"
            vb.memory = 2048
            vb.cpus = 2
        end
        node.vm.hostname = "kubenode0#{i}"
        node.vm.network :private_network, ip: IP_NW + "#{NODE_IP_START + i}"
                node.vm.network "forwarded_port", guest: 22, host: "#{2720 + i}"

        node.vm.provision "setup-hosts", :type => "shell", :path => "ubuntu/vagrant/setup-hosts.sh" do |s|
          s.args = ["enp0s8"]
        end

        node.vm.provision "setup-dns", type: "shell", :path => "ubuntu/update-dns.sh"
    end
  end
end
vagrant up # VM을 프로비져닝마스터 노드 1대, worker 노드 2대가 세팅됨.
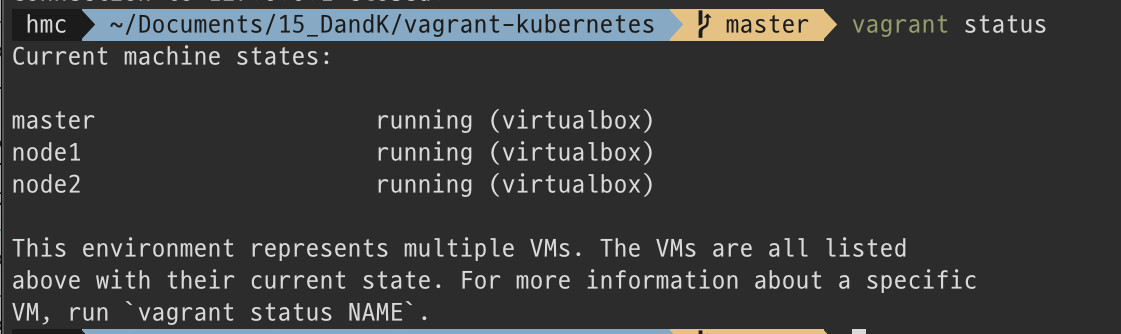
'vagrant ssh master'로 노드 내부에 접근할 수 있음

2. KubeADM으로 쿠버네티스 세팅
1. KubeADM 설치: Installing kubeadm | Kubernetes
1.1 제약 조건
- 운영체제: Linux
- 자원
- 2GB 이상의 RAM
- 2 CPU 이상
- 네트워크
- 클러스터 안의 노드들끼리 network가 모두 연결되어 있어야 함 (private이든 public이든)
- hostname, Mac 주소, product_uuid가 노드별로 달라야 함.
- 특정 포트들이 open되어 있어야 함
- Control Plane
Worker node(s)Protocol Direction Port Range Purpose Used By TCP Inbound 6443* Kubernetes API server All TCP Inbound 2379-2380 etcd server client API kube-apiserver, etcd TCP Inbound 10250 kubelet API Self, Control plane TCP Inbound 10251 kube-scheduler Self TCP Inbound 10252 kube-controller-manager Self Protocol Direction Port Range Purpose Used By TCP Inbound 10250 kubelet API Self, Control plane TCP Inbound 30000-32767 NodePort Services†
1. 2 Container Runtime(Docker, containerd, CRI-O) 설치
- Docker
- 도커 설치
# 모든 노드(마스터, 워커)

sudo -i # root로 전환
apt-get update && apt-get install -y apt-transport-https ca-certificates curl software-properties-common gnupg2

curl -fsSL https://download.docker.com/linux/ubuntu/gpg | apt-key add - #docker의 공식 GPG 키를 저장

add-apt-repository "deb [arch=amd64] https://download.docker.com/linux/ubuntu bionic stable"
- 도커 데몬 서비스 실행
-
cat <<EOF | sudo tee /etc/docker/daemon.json { "exec-opts": ["native.cgroupdriver=systemd"], "log-driver": "json-file", "log-opts": { "max-size": "100m" }, "storage-driver": "overlay2" } EOF -
mkdir -p /etc/systemd/system/docker.service.d -
systemctl daemon-reload systemctl restart docker - systemctl status docker.service 로 도커 서비스가 실행되고 있는 지 확인 가능
-
- 도커 설치
1. 3 Kubeadm, Kubelet, Kubectl 설치 (마스터랑 워커에 다 설치)
- kubeadm: the command to bootstrap the cluster
- kubelet: the component that runs on all of the machines in your cluster and does things linke starting pods and containers
- kubectl: the command line util to talk to your cluster
sudo apt-get update
sudo apt-get install -y apt-transport-https ca-certificates curl

# Google Cloud public signing key 추가
sudo curl -fsSLo /usr/share/keyrings/kubernetes-archive-keyring.gpg https://packages.cloud.google.com/apt/doc/apt-key.gpg

# 쿠버네티스 apt 레포지토리 추가
echo "deb [signed-by=/usr/share/keyrings/kubernetes-archive-keyring.gpg] https://apt.kubernetes.io/ kubernetes-xenial main" | sudo tee /etc/apt/sources.list.d/kubernetes.list

# 설치
sudo apt-get update
sudo apt-get install -y kubelet kubeadm kubectl
sudo apt-mark hold kubelet kubeadm kubectl
2. Cluster 세팅: Creating a cluster with kubeadm | Kubernetes
2.1. 클러스터 생성
마스터 노드에서 kubeadm init으로 cluster를 생성.
kubeadm init #initialize control-plane nodeconfiguration 파일들을 $HOME/.kube/config 폴더로 복사
mkdir -p $HOME/.kube
sudo cp -i /etc/kubernetes/admin.conf #HOME/.kube/config
sudo chown $(id -u):$(id -g) $HOME/.kube/config
2.2 Worker 노드 추가
만들어진 join 토큰을 worker 노드에 복사하면 worker 노드가 클러스터에 추가됨.
kubeadm join <control-plane-host>:<control-plane-port> --token <token> --discovery-token-ca-cert-hash sha256:<hash>
만약에 kubeadm init 했을 때 나온 join 토큰을 잃어버렸으면 새로 생성할 수도 있음
kubeadm token create --help
kubeadm token create --print-join-command
3. Pod network add-on 설치
Pod끼리 통신하기 위해서는 CNI(Container Network Interface)를 따르는 Pod Network add-on을 설치해야 함. 설치하기 전까지는 kubectl get nodes했을 때 노드의 상태가 NotReady로 표시됨. (쿠버네티스 안의 DNS인 CoreDNS는 Pod Network add-on이 설치되어야 작동함.)
설치 가능한 add-on 목록: Cluster Networking | Kubernetes
weave로 설치: 아래 명령어를 적용하면 service, clusterrole, role binding 등을 만들어 줌
kubectl apply -f "https://cloud.weave.works/k8s/net?k8s-version=$(kubectl version | base64 | tr -d '\n')"
'도커와 쿠버네티스 > CKA 자격증' 카테고리의 다른 글
| [CKA] Kubernetes: 클러스터 관리(버전 업그레이드 및 백업하는 방법) (0) | 2021.07.05 |
|---|
